Roadbed/Track
Redirection into the shop
28/06/25 09:53
Reconsidering a three room layout.
With Winwood gone from my shop and Piedmont gone from my office, I had a one room layout. The space opened up in my shop by removiing the Winwood benchwork was quickly allocated in a general rearranging campaign that worked out well. The access holes that allowed the track to pass through the wall separating the layout room from the shop remained open because the possiblity of extending the layout back into the shop is just too awesome an opportunity.In the dim and distant past, I have built layouts that extended into the shop before. A long, narrow shelf along the wall with a few staging tracks was never the issue that Winwood became. It did not impose significantly on the space, did not require someone to spend a lot of time in the shop switching cars. It did not draw attention to the generally cluttered, dirty disposition of the shop or its lack of climate control.
Extending the layout into the shop is not a bad idea, but trying to build a scenic, detailed, finished section of the layout there proved to not be a particularly good idea. Suited for staging or fiddling, the shop can add a lot of operating interest even if it isn't an ideal environment for a layout. Having a one room layout is good, but the configuration of the space my layout occupies is very conducive to a three room layout, which is better. Now I know. The Piedmont and Winwood sections of my layout that I deleted were good ideas that could have been better.
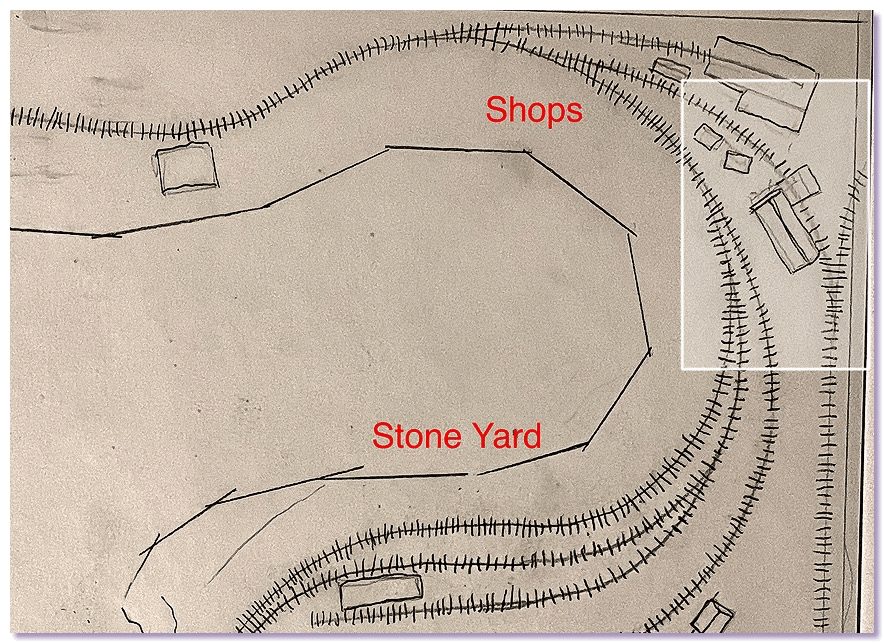
the area in question; adding what will be a hidden turnout
A better idea for Winwood starts in the southwest corner of the layout, which is the far right corner when you are standing at the door.
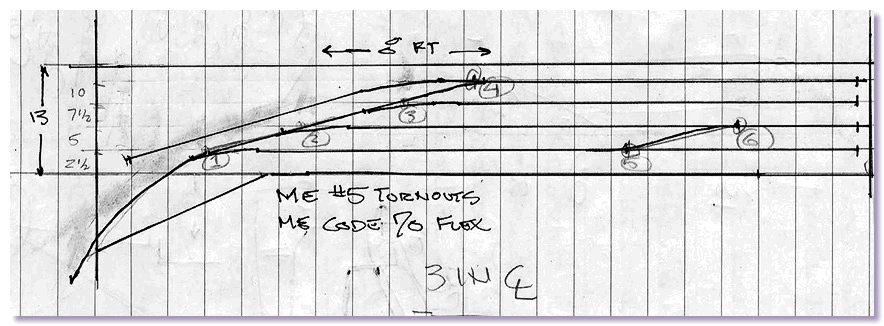
Preliminary track plan for shelf in shop
A turnout in the corner would direct trains to a narrow, removable shelf in the shop that would sit on the long workbench that runs across the back of my shop. Normally stored out of the way, the shelf should be quick and easy to install for layout operation. When the shelf in the shop is not installed, the corner turnout could be thrown to divert trains through the shop scene, allowing for continuous running.
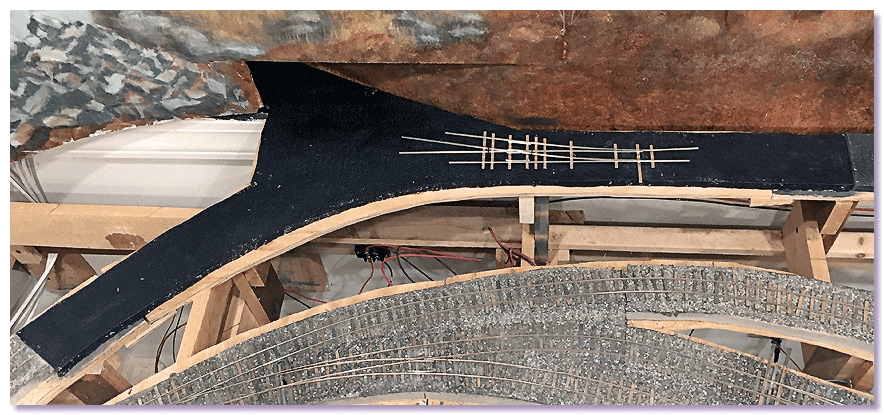
Positioning a Fast Tracks # 6 turnout
The new turnout being installed in the corner will eventually be hidden which makes me a bit nervous, but it will not be thrown very often.
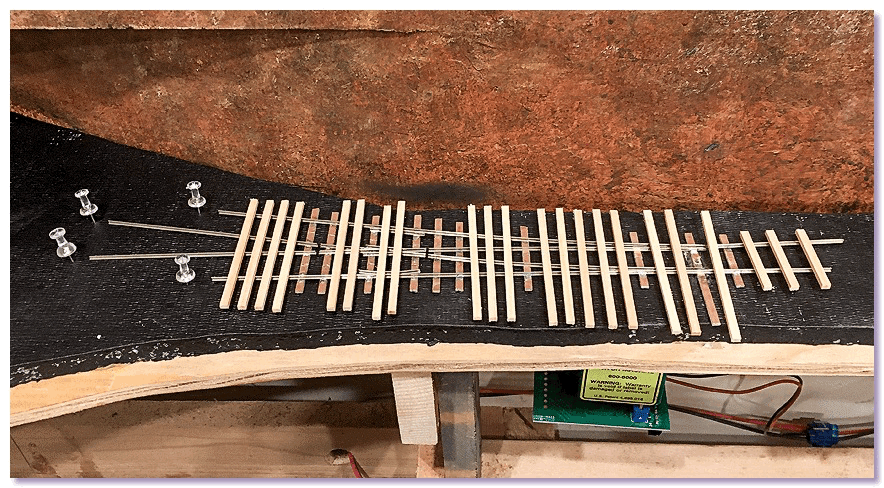
Placement of wooden ties
I will weather the ties and ballast the track up to and through the new turnout in the corner since I don't yet know how much will be hidden by the scenery in this area.
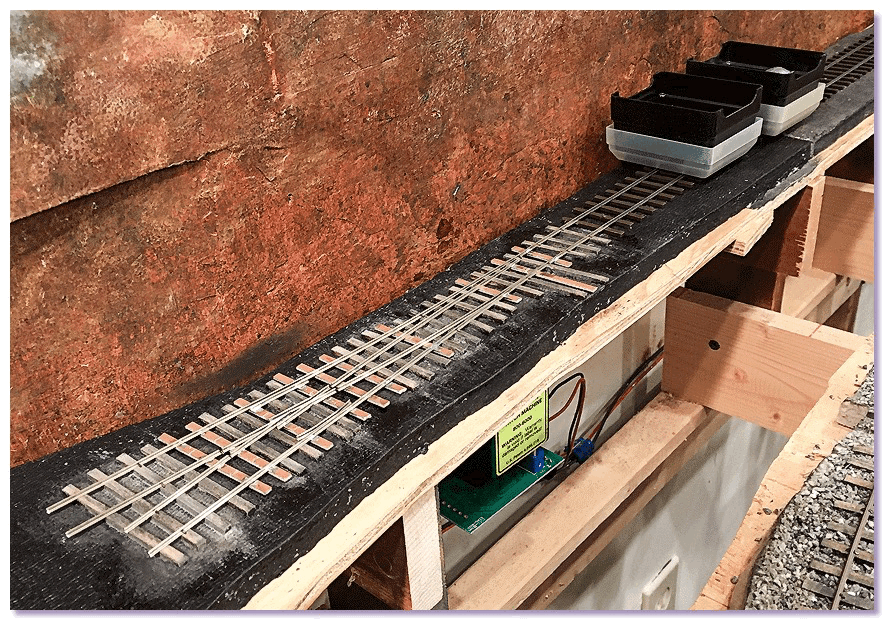
New turnout spiked down, Tortoise switch machine installed
I am looking forward to having the layout extend into another room again. The impression that gives of the trains actually going somewhere is amazing and could hardly be overstated.
Tracks and Trains
03/08/24 09:15
New sidings go in once the turnout is in place

Long strips of crossties are glued in position on the new assembly plant and boilerhouse sidings.

Once the glue is dry, the crossties are sanded level across the top and stained. Then the rail can go down. Code 70 rail looks especially small spanning the pit where coal will be unloaded for the boilerhouse.

"Work trains" with various locomotives and a range of rolling stock are run through the new turnout and down the new sidings to test the electrical connections and tune the track.

New track is the best excuse ever to do some operating.

Then I headed up to the Quarry Gardens at Schuyler to make some track adjustments on the Railroad Display.
New Mill Lead - 2
30/03/24 08:43
Extending off old roadbed

Plywood for the new subroadbed is not quite as thick as the old subroadbed. Apparently I didn't notice that when I was installing it, so I had to come up with a shim to raise the Homasote roadbed up to match the height of the old roadbed. Or maybe the new Homasote is thinner than the old. At any rate an adjustment in height had to be made right under the location of a new turnout.

The new Homasote roadbed painted black and glued in position. The gap in the boilerhouse roadbed is space for coal to be unloaded from hopper cars.

A Fast Track turnout tacked in position so crossties can be cut and spaced.

Crossties cut and placed in postion. The turnout will be lifted off and the turnouts glued down. This area proved to be a problem in that the turnout spans across three sections of Homasote. The thickness and density of each of the three sections vary. To have a roadbed situation like this directly under a turnout is asking for problems.
New Mill Lead
02/03/24 08:53
Rearranging Yet Again

Continuing with track revisions, work focused on the new mill lead.

One of the turnouts for the locomotive service track had to be pulled up.

Two new turnouts had to be fabricated.

The rails for the locomotive service track turnout were lifted, the ties and ballast scraped off the Homasote roadbed.

The new Mill Lead turnout was positioned so the Tortoise switch machine for the old locomotive service track turnout did not have to be moved. Same hole in the roadbed, same actuator rod. Previously, the locomotive service track turnout had been positiioned to take advantage of a pre-existing Tortoise location. Therefore this Mill Lead turnout is the third turnout powered by the same Tortoise switch machine.
Extension in the corner
05/02/24 20:05
"Take Me to the Hole!"

With the standard gauge track and roadbed out of the way, the cardboard patterns were used to determine where to place new risers.

The cardboard patterns were then used to cut plywood subroadbed to rest on those new risers.

Where the track was going to pass through the wall, a new cardboard pattern had to be made. The first pattern brought the subroadbed up to the wall, but the Homasote roadbed needed to pass through the wall into my office.

Clearances were checked, adjustments were made.

Roadbed extends into the office once again.
Redirection in the Corner
21/01/24 08:20
Revised track configurations.
 Operating as if the Dust Mill is moved to the east wall. Nice!
The activities recorded in the 'Plans' post dated December 5, 2023 resulted in a pile of cardboard patterns to be used for making new roadbed in several areas of the layout.

Standard gauge rails pulled
The most significant change was that the standard gauge transfer tracks would have to go.

Roadbed and risers for standard gauge transfer tracks completely gone
Redirection Along the Wall
21/11/23 10:35
We return to the hidden track.
I ended the previous 'Projects' post with a photo of the "unwanted view of the hidden track running along the wall." Also refer to the 'Plans' post entitled 'Discusssions and Decisions.'
Looking down the hidden track from the doorway
After discussing the situation with Brian and soliciting opinions via email, I determined the long hidden track needed to be revised.

Looking back the other way, showing where the backdrop is cut
Instead of forming a reverse loop, I decided to divert the hidden track through the backdrop into the shop room next door where it would access a fiddle yard.

Track scraped up. . .
I cut a slit in the backdrop so it could be bent back into a hole in the wall behind it.

. . . then roadbed and sub-roadved cut and pulled up
The fiddle yard will be a removable module that will sit on my workbench and represent an unmodeled quarry.

Roadbed flipped over to curve in opposite direction
I was able to simply flip the subroadbed and roadbed over and use them to curve the track out of rather than into the room.
Standard Gauge Sidings
30/11/20 09:55
Over at the Transfer, it was time to install the standard gauge sidings.
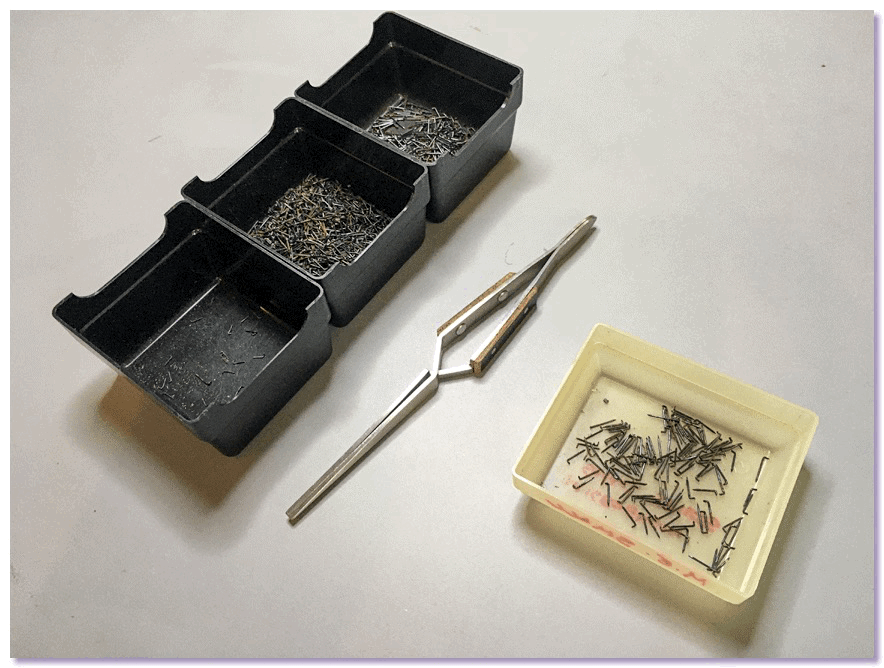
As I was pulling up track in the ill-fated Piedmont and Winwood sections of the previous layout, I deposited the spikes in a container. Later I separated those spikes by size into three main groups. I had used some oversized Micro Engineering or Walthers spikes, particularly to spike down turnouts. I had used a lot of medium sized ME spikes. And I had used a surprising number of teeny tiny ME micro spikes, which are nearest to scale appearance but are sorely impractical to use anymore due to age related deterioration of my eyesight.

I used the large spikes to install the Code 125 standard gauge sidings at the mill site. Due to my using hastily homemade track gauges, I was not absolutely certain the distance between the rails was precisely P:48 standard gauge, so I only spiked the rails down to every fifth tie or so in case the track gauge needs to be adjusted. I ordered rail joiners for Code 125 rail but Code 100 rail joiners arrived. Since the sidings are absolutely straight, I was able to get along without rail joiners for the time being.
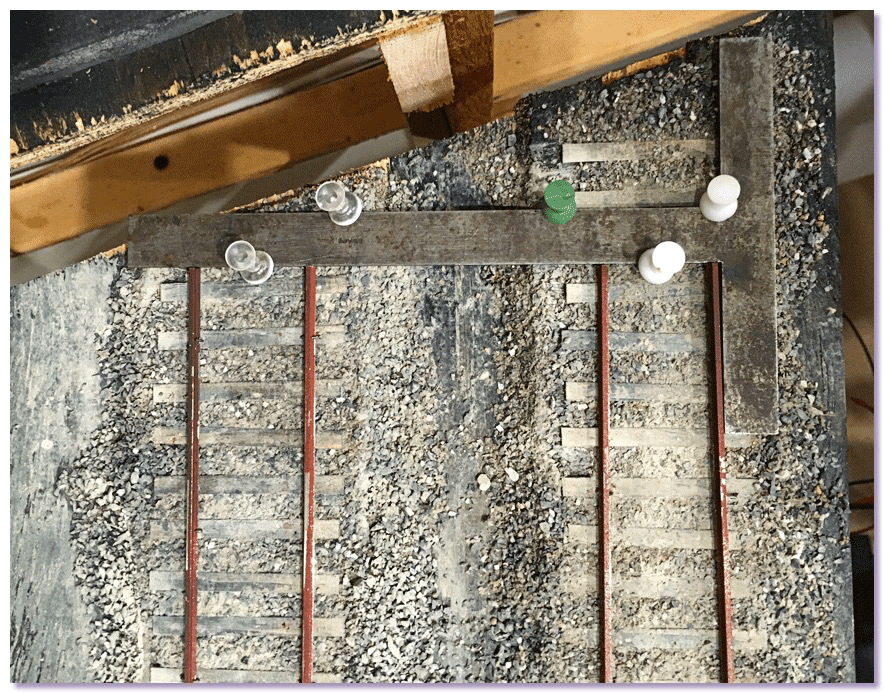
I took care to ensure the rail ends that were close against the wall were aligned and perpendicular to the direction of the sidings.

The reason being that the plan is to eventually install a mirror at that end of the sidings. The mirror will reflect the track in a way that suggests it continues on and does not stop just short of the hidden track behind it. The sides and top of the mirror will be hidden by structures in the mill campus.
The mirror test verified that it will be possible to make it look like the sidings extend to the distance. But the shorter of the two sidings is so short that the far end of track is plainly visible in the reflection, so I will have to come up with some way of blocking the full length reflection of that track.
Ballast and P:48
12/11/20 11:01
I am not particularly careful about mixing my ballast recipe.
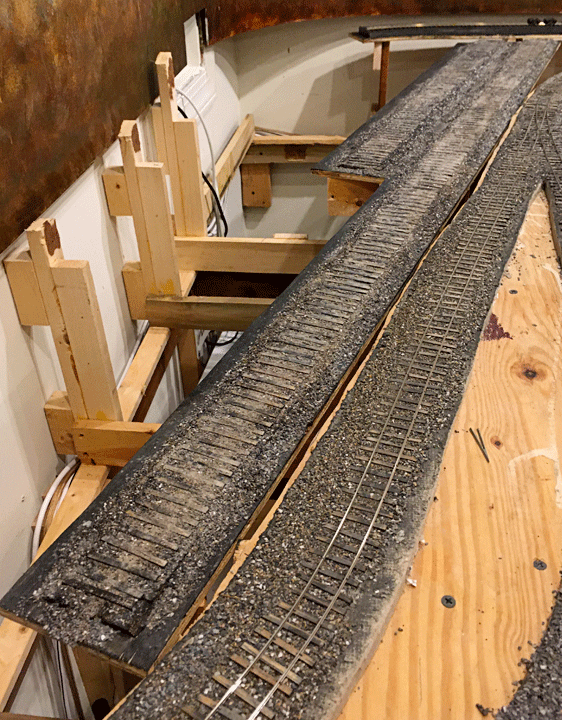
I mix ballast from three basic ingredients:
1. Crushed and screened limestone. I like the neutral color, and how the individual pieces tend to be flat "flake" shaped, which helps to make them look embedded in the ground when spread on roadbed.
2. Dirt from my neighborhood streets. The best time of year to collect street dirt is early Spring. Sand that was spread on the road over the Winter has been ground to a powder by the wheels of passing cars and has drifted to the curb.
3. Soapstone dust. Collected from the floor of the dust mill bagging plant at Schuyler, soapstone dust is light gray with a slight blue-green cast. I will apply it as a weathering powder on just about everything on the layout, so the roadbed needs to be uniform as well.
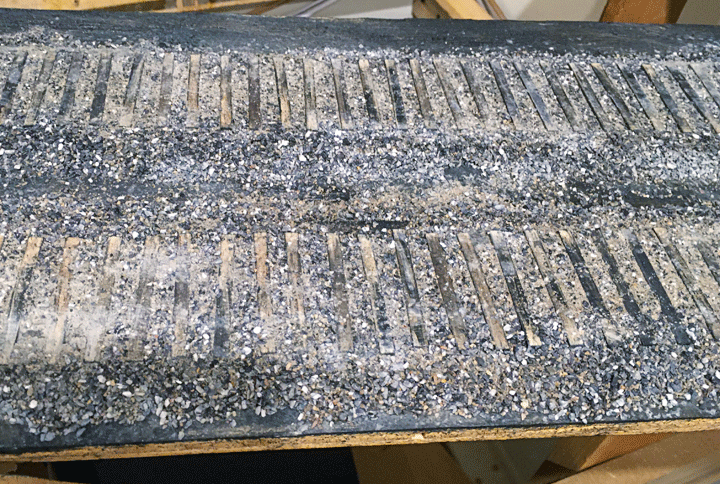
The problems I have with mixing ballast manifest themselves after the ballast is spread on the roadbed. The act of wetting the ballast before gluing it causes the limestone to turn much darker. Once the adhesive is applied to the wet limestone, it never lightens up again after the ballast has dried. The second problem is that the smaller particles of road dirt and soapstone dust tend to be rinsed off the surface of the ballast through the process of wetting and gluing it. I have gotten in the habit of both applying more dust and dirt to the ballast after it is glued down, and going over it with a thin wash to revive the soapstone dust weathering. Rather than depend on a precise ballast mix, the final application of dust and a wash help pull together the tone of different batches of ballast that were mixed and applied at different times.

Ballasting areas along the mainline where the track arrangement was revised meant redoing areas that were originally ballasted over 10 years ago. With a light addition of dust and dirt on top and a thin light colored wash, the new ballast matches the old reasonably well.

With the two long, straight standard gauge tracks ballasted, I could lay the rail. But I don't have any P:48 track gauges. I had a set of very nice custom made O gauge track gauges when I was working on the Railroad Display at the Quarry Gardens, but I did not want to go to that expense for the sake of the little bit of standard gauge track to build on my home layout.
I quickly knocked together two crude track gauges in styrene. They would suffice given that the track I had to lay was simple, straight, and static, not having to reliably handle moving trains. The Code 125 rail I used for the standard gauge track is stiff enough to remain straight on its own, so it was just a matter of uniformly spacing the rails 4 feet 8 inches apart.
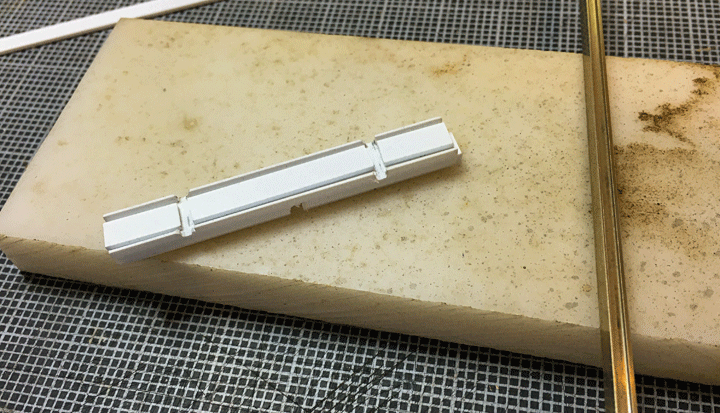
A Plastruct I-beam and a few strips were glued together, then grooves were cut the approximate width of the Code 125 railhead approximately scale 4 feet 8 inches apart.

I turned the track gauge over and cut another groove in the top that was centered between the rails.
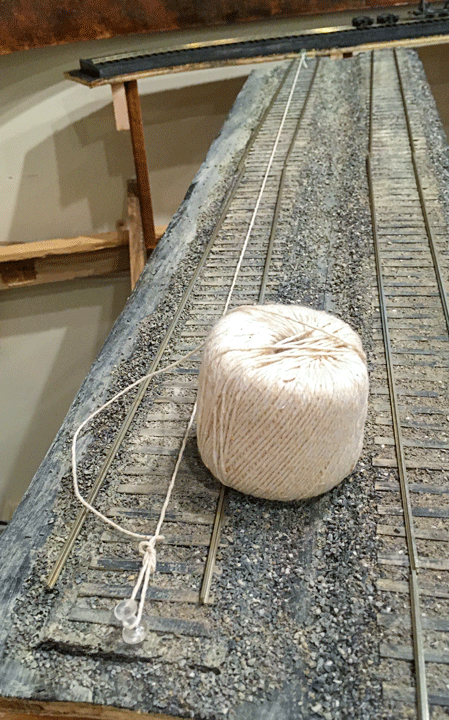
I tacked a centerline down the length of the siding before positioning the rails. Time to start laying track.
Slingin' Ties
20/10/20 20:16
I seen a front porch swing, heard a diamond ring
I seen a polka-dot railroad tie. . .
–"When I See an Elephant Fly," Cliff Edwards, Hall Johnson Choir
With the position of the new turnouts sorted, I needed to install a lot of new railroad ties.
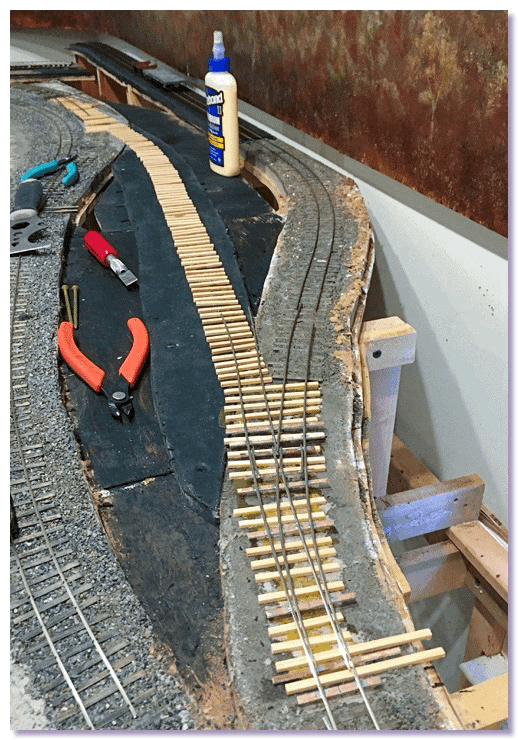
The location of the new locomotive service track set, I loaded up the piano jig and laid out the required ties.

While I was at it, I went ahead and laid out the standard gauge ties for the transfer tracks. I do not have a standard gauge piano jig, so I turned a piece of ME O scale flex track upside down and used it as a guide to space the ties.

The O scale ties fit pretty precisely on top of the cork roadbed.

I stained the ties and roadbed with a heavy coat of Minwax Ebony. Once dry I sanded a lot of the stain off the tops of the ties.

Hunter stains were applied to the sanded ties, with a thin wash of light gray acrylic craft paint as a final coat.

Time to mix up some ballast.
Track revisions - turnouts
20/08/20 10:58
The Demo Crew left the track work on the layout full of gaps.

Two of the gaps were to accommodate the Fast Tracks turnouts I had built for the new Shop Track. As is typical for Demo Crews, they were not particularly careful about how much track they ripped out.

I placed the new turnouts as precisely as I could and held them in position with map tacks. Rails were trimmed to length and everything was marked up.

The Fast Tracks jig I used to build the curved turnouts is actually for HO standard gauge. By now Fast Tracks probably produces On30 curved turnout jigs, but I worked with what I had. I brought the turnouts back to the bench and replaced the HO standard gauge crossties with On30 ties everywhere but under the frog and guardrails.
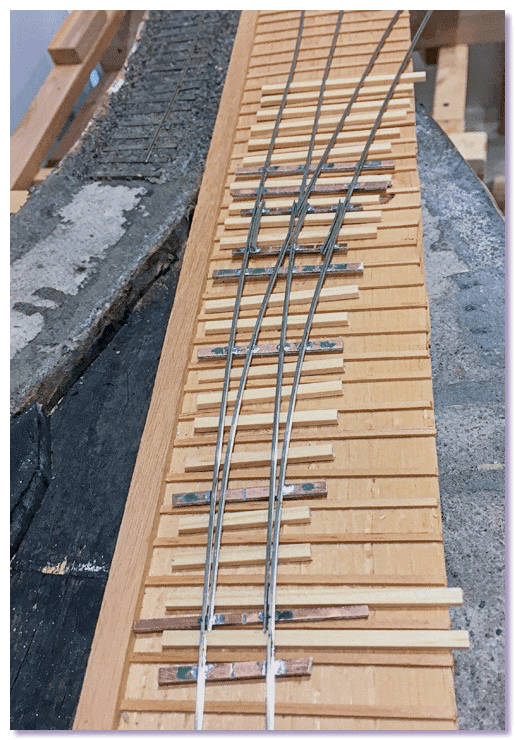
The turnouts were then moved to my trusty old piano jig so I could cut the new wooden On30 ties needed for the install. Even though the turnouts are curved, I was still able to use the jig for tie length and spacing.

The strings of ties were pulled out of the jig and glued on the roadbed per my earlier turnout test placement.
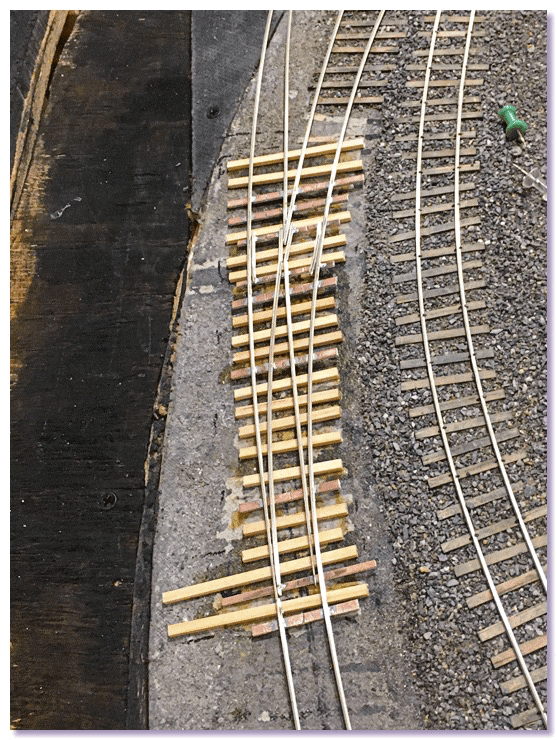
Turnouts were placed on the ties to verify placement again.
Building Turnouts
10/07/20 05:36
The revised track configuration for the Piedmont-Standard requires two new turnouts.
I initially assumed I would build the new turnouts in place and just drew the new shop siding on the plan without a lot of thought given to frog angles or track geometry.

It occurred to me to pull out my old Fast Tracks fixtures to see if I could use any of them to build the shop siding turnouts. Using the fixtures is preferable to building the turnouts in place since they make it much easier to maintain consistent dimensions and tolerances. I have built turnouts in place but it is a long process of fitting, adjusting, and tuning. FasTrack fixtures get me 90% of the way toward a reliable turnout and allow working at my bench rather than reaching over the benchwork.

My curved fixture with a #6 frog angle was close enough to what the shop siding needed for me to give it a try. Over ten years since the last time I used them, the instructions, tools, and materials still felt familiar and the process went fairly quickly.
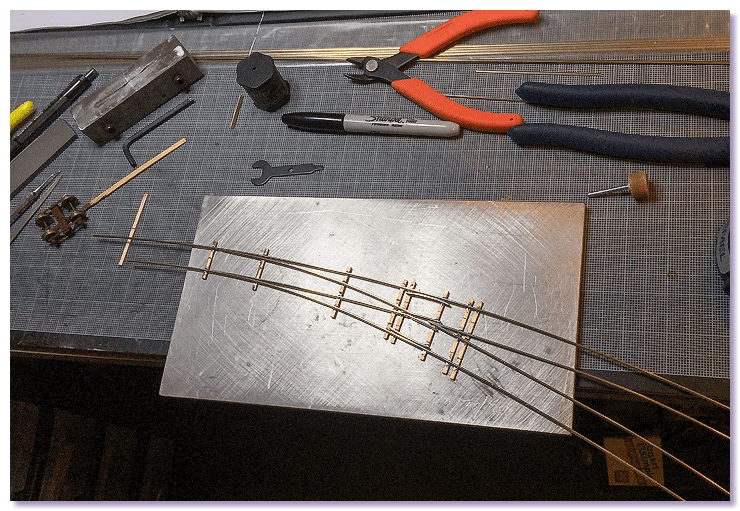
I built the turnouts with overly long stock rails coming off to tie into the existing track work, hoping that would give me some "wiggle room" to splice new track into old.
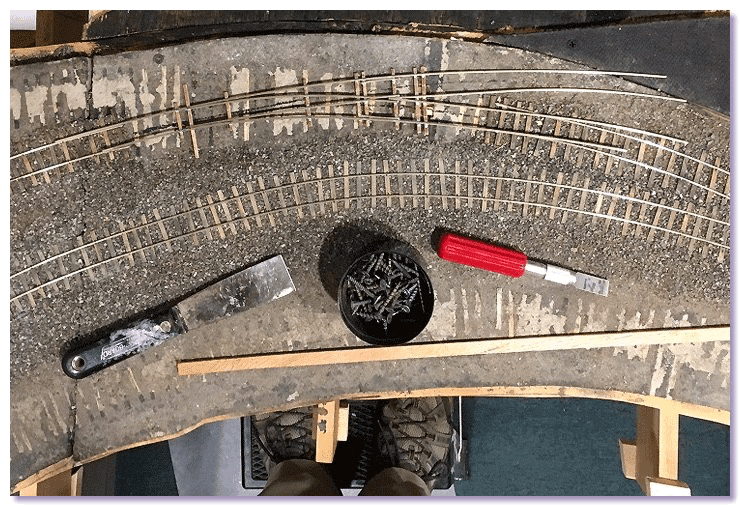
Test fitting the new turnout for the shop siding west end.
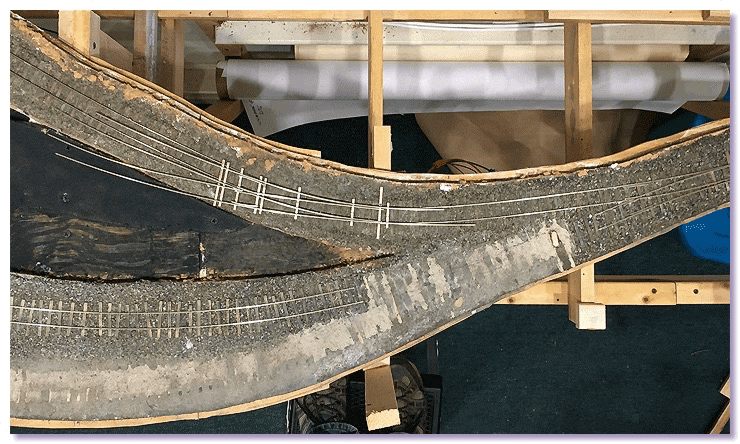
New turnout for shop siding east end sitting on top of the old Ariel Church siding.
Installing Flex Track
16/06/20 09:38
Having decided to use cork roadbed for the standard gauge track, it was time to install it.
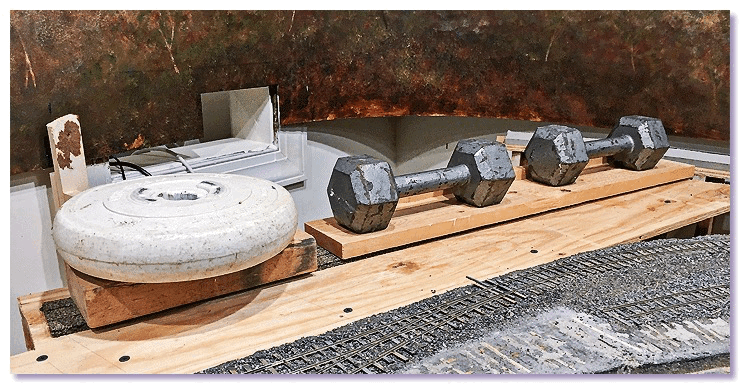
Liquid Nails adhesive was used with plenty of weight applied until it set.

And so it went with the new sections of Homasote roadbed.

Once installed, the new Homasote roadbed was painted dark gray to seal it.

Micro Engineering On30 code 70 flex track was installed on the hidden sections.

New and revised On30 tracks that are not hidden will be hand laid.
Standard Gauge Roadbed
28/05/20 12:20
My meager supply of leftover Homasote went toward new roadbed.
I was able to piece together sections of reasonable length to do the hidden tracks.
The long, straight standard gauge sidings would have required a puzzle of Homasote scraps, so another approach was needed. I had good results on the Railroad Display for the Quarry Gardens at Schuyler using Midwest cork roadbed and Atlas 2 rail O gauge flex track.

Setting some O scale cork roadbed in position with a stick of O gauge flex track on it did not look right to me. The cork roadbed appeared too wide, and the flex track did not have the look of an industrial siding.

Three strips of HO cork roadbed are narrower than two strips of O cork roadbed and appeared to be a better fit under O scale crossties.
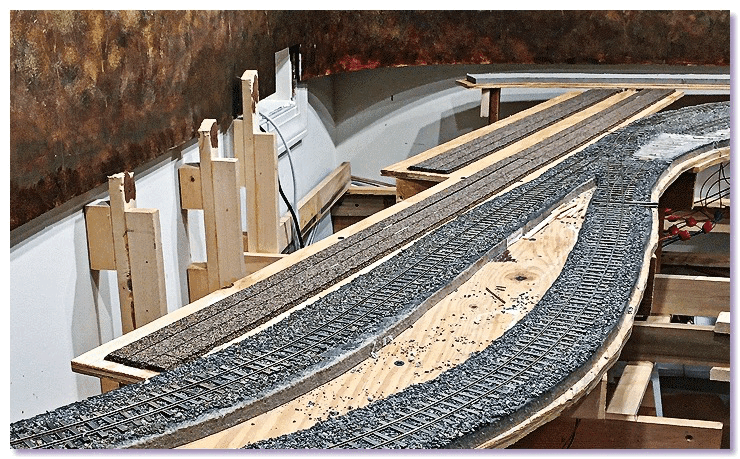
I went with three strips of HO cork roadbed for the standard gauge sidings at the mill site, which will be hand laid to P:48 gauge.
Installing Roadbed
24/04/20 11:33
With the sub roadbed ready, risers were cut and installed
Spirit and line levels were used to set the height of new roadbed.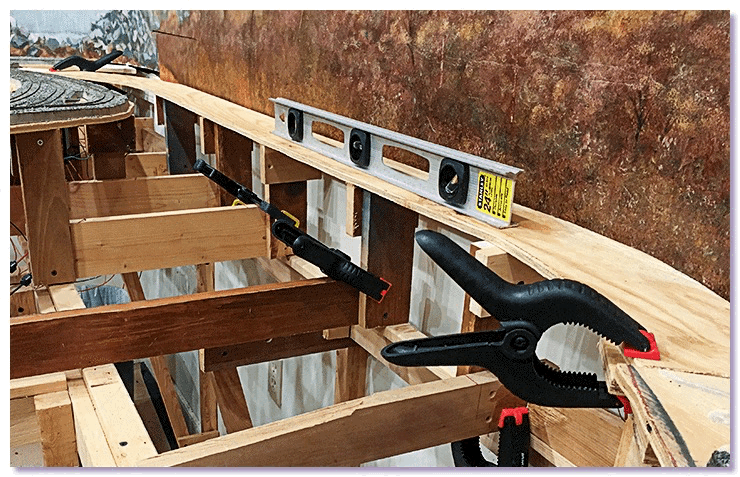
sub roadbed for hidden track along west wall
All new track is level, which made installation pretty straightforward.

Sub roadbed for hidden track in northeast corner
I had enough leftover Homasote scraps to piece together roadbed for the new tracks. For the most part, it was a simple matter to use the plywood sub roadbed as a pattern for cutting out Homasote roadbed.

Location of new locomotive servicing area
Locomotive servicing used to be in the northeast corner of the train room, but that is now the location of the transfer with the standard gauge Piedmont & East Blue Ridge Railroad. Narrow gauge locomotive service is now along the east wall near the junction with the northeast hidden track. I mocked up some small buildings to help visualize how the service facilities would fit in this small, odd shaped space.

The mainline runs between a company access road on the old Scale Track grade and the new engine shed
There was no new section of plywood sub roadbed that could be used as a pattern to cut out the Homasote roadbed for the new locomotive service track.

Full size plan of locomotive service area
I laid out a full sized plan of the new service track on the shop floor and used building mockups, locomotives, and rolling stock to make sure the plan was workable.

Full size planned positioned on layout
Once I verified that the plan was OK as is, I placed it in position on the layout. I was able to use the plan as a guide for cutting the Homasote roadbed for the new locomotive service track.

New roadbed for service track
Barely having enough leftover Homasote to try this one time, I carefully cut and fit the new roadbed.
Installing Subroadbed
30/03/20 08:55
Planning to revise the track layout, I noticed there were two thicknesses of plywood sub roadbed.
There were complex combinations of blocks splicing sections together, and it soon became apparent why.
Thick on top of thin to the left, and thin on top of thick to the right
The plywood for new subroadbed matched the thinner plywood that was used before. Masonite shims brought the level of the thin plywood up to a close match to the thick plywood.

A Masonite shim to raise up new thin plywood to match old thick plywood sub roadbed
A bridge girder taped to a flatcar helped determine the height of a loading dock that will have standard gauge tracks on one side and narrow gauge on the other.

Determining the height to make the standard gauge so floor level of cars matches the narrow gauge
The standard gauge track will be at a lower level in order to match up deck height with the narrow gauge.
Trackplan Revisions
07/03/20 10:47
Changing my On30 layout from the Piedmont & East Blue Ridge to the Piedmont-Standard Stone Company required making some changes to the track plan.
The most obvious changes were removing the extensions of the layout that went into my shop and my office. Those were pulled out a while back. The deletion of those two areas required making a few revisions to the track that remained in the train room.

Revisions to the East Blue Ridge to transform it to the Piedmont-Standard
When I lost the extensions, I lost a mill site that was in the office and a standard gauge transfer that was in the shop. On the Piedmont-Standard, the mill site and standard gauge transfer are combined. This is a more conventional arrangement, as it would have been more typical for the narrow gauge to provide transportation between the quarries and the mill. Finished products from the mill are loaded into standard gauge cars for shipment to the Outside World. On this revised layout, the Piedmont & East Blue Ridge Railroad has become the standard gauge shortline connection which is represented by two sidings that will end at a mirror in the mill complex, implying that they extend a few miles to the Southern Railroad at Aberdeen, Virginia.

Working out the placement for the new standard gauge sidings
The new mill site with its attendant new standard gauge sidings are on the layout where the locomotive service area used to be, so locomotive servicing had to be moved to the right a few feet, requiring a new track of its own. New track also includes the addition of two hidden tracks.
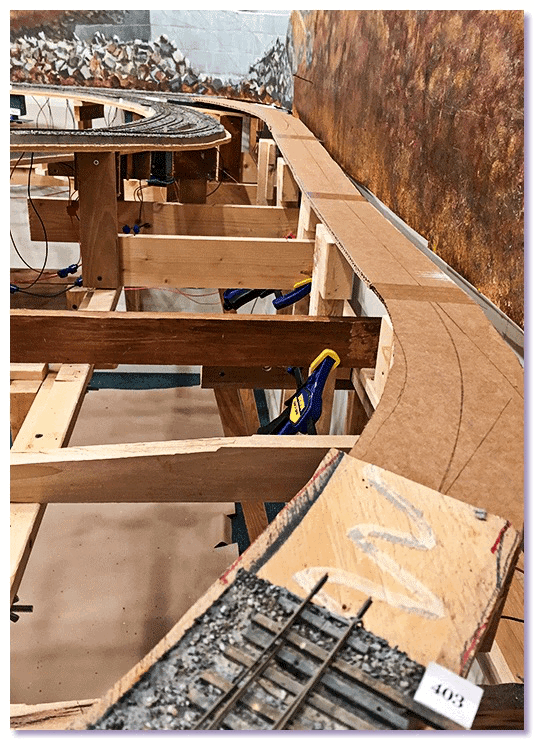
planning sub roadbed for hidden track along west wall
Even though the P&EBR version of the layout was larger, it had less hidden track than the Piedmont-Standard. I am not a big fan of hidden track, but I came to the conclusion that the track plan could benefit from the addition of hidden tracks that might enhance operation enough to make them worthwhile. One is along the west wall, the other runs along the east wall toward the northeast corner. These hidden tracks open up the possibility of operating the layout a number of different ways, which could come in handy if I ever host any more group op sessions.

There already was a hidden track in this corner, but it curved away from the wall in order to go through a hole in the wall to the office. The new hidden track stays straight along the wall.
To begin the process of adding track to the Piedmont-Standard, I cut patterns for the new sub roadbed from corrugated cardboard. Once the patterns had been trimmed and shaped to final size, I laid them on a sheet of 3/8 inch plywood and traced them.

Preparing to cut plywood sub roadbed
Pulling Up Winwood
06/08/19 06:33
Out of another room
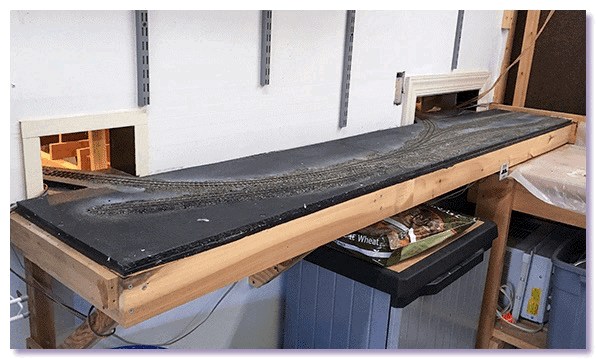
The entire surface of the Winwood shelf was Homasote. I wanted to save and possibly reuse it.
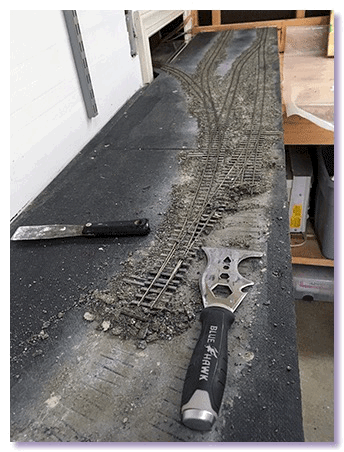
Scraping up the track and ballast was messy but didn't cause much damage to the Homasote.

Track and Homasote roadbed were cut at the holes in the wall.

The Homasote was secured to the plywood subroadbed by a few drywall screws. Once it was removed, I had a nice shelf that will remain in place.
Turning the Corner
29/01/19 17:40
The pace of demolition is slowing, and some repairs are made.
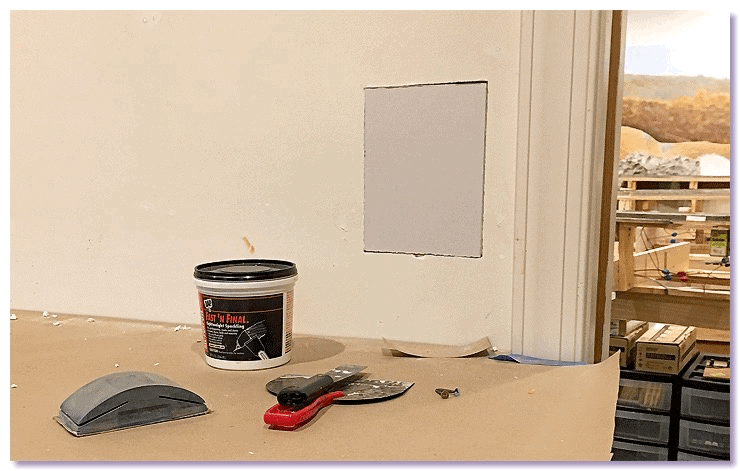
The hole where the Mill Lead tracks used to go through the wall of the train room into the office is plugged and being patched for new paint. I am giving thought to reinstalling the pocket door that had to be removed when I extended the roadbed through the wall here.
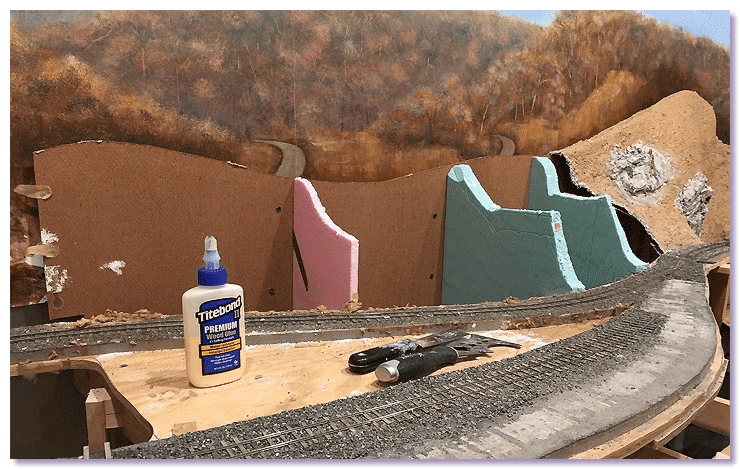
The hillside that was to be the talc loading operation has been removed. After all the sketching and mocking up and hand wringing that went into that scene, it has been deleted. The new focal point on the layout in this area will be about where the glue bottle is sitting. A nondescript wooded slope will be behind it.
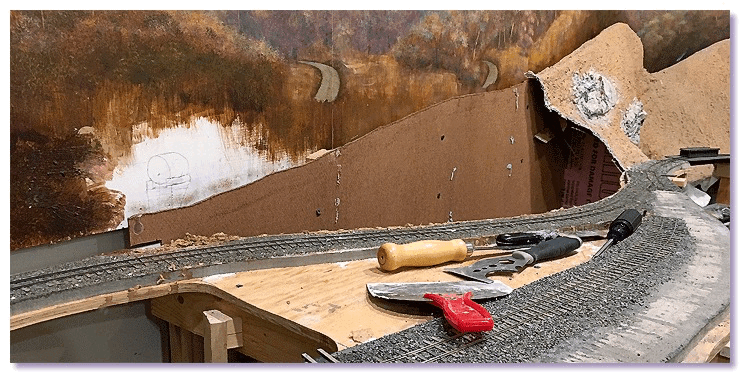
Trimming the rear scenery profile down to its revised height revealed an ancient petroglyph on the backdrop.
On30 Railroad That Shrinks - 4
04/01/19 14:40
Demolition continues in the train room

Skeletal remains of Piedmont ready for the scrap pile
Without the Piedmont or Winwood sections, traffic volume on the remaining layout will be reduced, which in turn will reduce the need for siding tracks.

The rails are pulled from the Scale Track. This long siding came in very handy over the years when Shops Yard became congested.

Lifted turnouts are piling up, as are the pulled track spikes in the square container.

Ties are scraped off the Homasote roadbed. The Scale Track is history.
On30 Railroad That Shrinks - 3
24/12/18 19:08
With the Piedmont section of the layout removed from my office, demolition began in the Shops area of the layout.

The sub roadbed was cut back to the new end-of-track.

The continuous run connecting hidden track was pulled up . . .

And the roadbed removed.

Rails were pulled in the locomotive service area and that section of the roadbed was cut away.

The new mill site and standard gauge transfer will go along this wall to the corner.
The On30 Layout That Shrinks
01/12/18 14:25
I can remember when Kalmbach Publishing released this book:
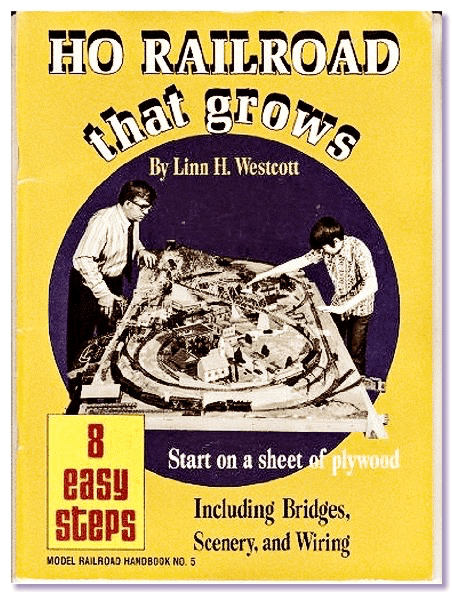
The assumption being that a bigger model railroad was a better model railroad.
After working in my shop for a few years on a big project, I started getting the impression that my layout was too big. There were terminal sections in two rooms adjacent to the room the layout occupied. Operationally, extending the layout into the office and shop was a great idea, and that was how things remained for over 10 years. During that time, I saw my entire shop building's primary purpose as being to house the layout, with some space allocated for other things.
Over the last year I could not operate the layout at all, spending all my shop time constructing a display for a garden in Nelson County. When time allowed me to once again turn on the track power and run some trains, I found I had gotten out of the mood to operate, and was much more interested in building. There would be plenty to build in the train room alone. I considered deleting Winwood and Piedmont, and operated the layout as if they were gone. The truncated track plan still accommodates a reasonable amount of interesting operation, and I could have a lot more free space in my office and my shop.
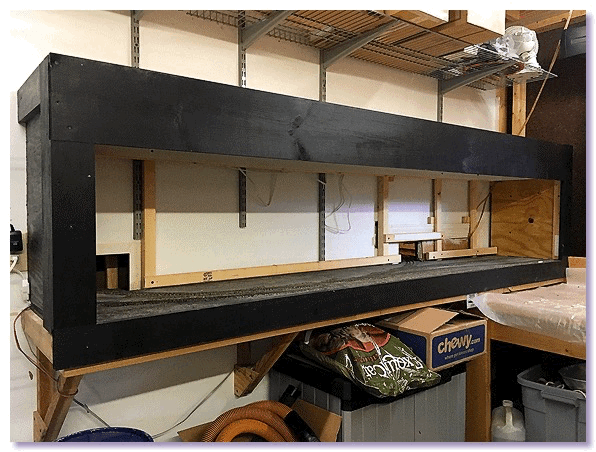
Winwood loses its backdrop
Initially, I had been planning on making revisions to Winwood that required rebuilding the shadowbox. But when I took the old shadowbox down, I decided I liked the shop better without a Winwood shadowbox at all.

Winwood loses its shadowbox
So the demolition began, and is currently in full swing.