Redirection into the shop
28/06/25 09:53 Filed in: Roadbed/Track
Reconsidering a three room layout.
With Winwood gone from my shop and Piedmont gone from my office, I had a one room layout. The space opened up in my shop by removiing the Winwood benchwork was quickly allocated in a general rearranging campaign that worked out well. The access holes that allowed the track to pass through the wall separating the layout room from the shop remained open because the possiblity of extending the layout back into the shop is just too awesome an opportunity.In the dim and distant past, I have built layouts that extended into the shop before. A long, narrow shelf along the wall with a few staging tracks was never the issue that Winwood became. It did not impose significantly on the space, did not require someone to spend a lot of time in the shop switching cars. It did not draw attention to the generally cluttered, dirty disposition of the shop or its lack of climate control.
Extending the layout into the shop is not a bad idea, but trying to build a scenic, detailed, finished section of the layout there proved to not be a particularly good idea. Suited for staging or fiddling, the shop can add a lot of operating interest even if it isn't an ideal environment for a layout. Having a one room layout is good, but the configuration of the space my layout occupies is very conducive to a three room layout, which is better. Now I know. The Piedmont and Winwood sections of my layout that I deleted were good ideas that could have been better.
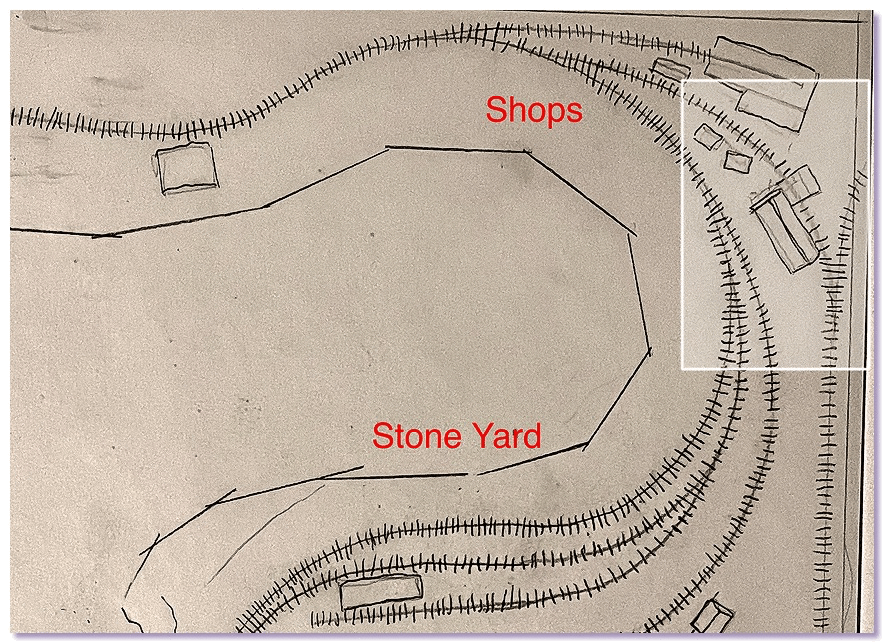
the area in question; adding what will be a hidden turnout
A better idea for Winwood starts in the southwest corner of the layout, which is the far right corner when you are standing at the door.
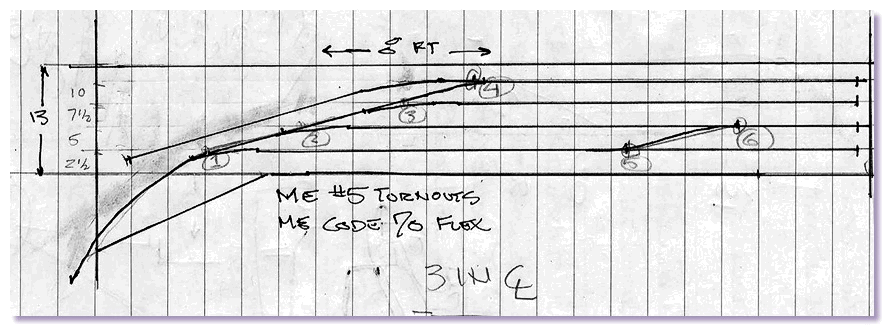
Preliminary track plan for shelf in shop
A turnout in the corner would direct trains to a narrow, removable shelf in the shop that would sit on the long workbench that runs across the back of my shop. Normally stored out of the way, the shelf should be quick and easy to install for layout operation. When the shelf in the shop is not installed, the corner turnout could be thrown to divert trains through the shop scene, allowing for continuous running.
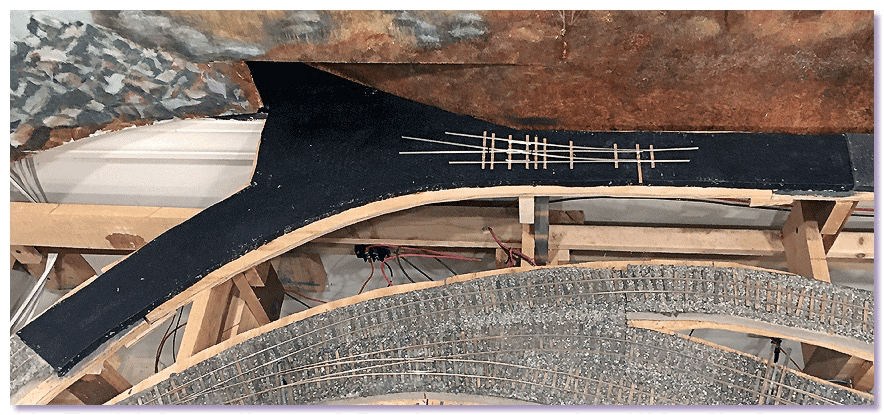
Positioning a Fast Tracks # 6 turnout
The new turnout being installed in the corner will eventually be hidden which makes me a bit nervous, but it will not be thrown very often.
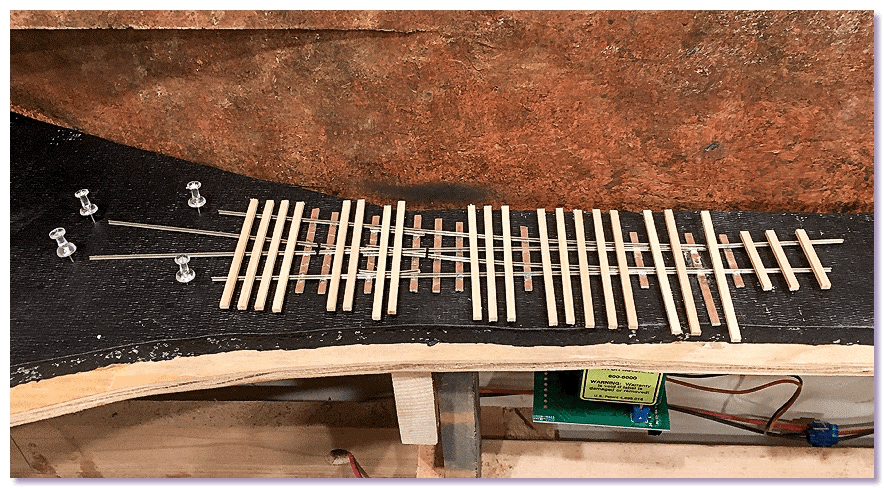
Placement of wooden ties
I will weather the ties and ballast the track up to and through the new turnout in the corner since I don't yet know how much will be hidden by the scenery in this area.
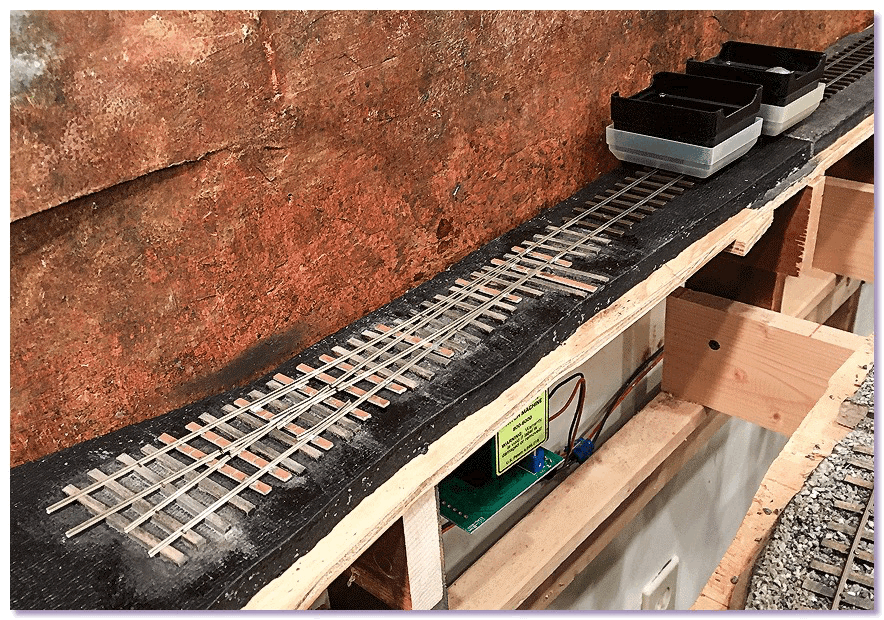
New turnout spiked down, Tortoise switch machine installed
I am looking forward to having the layout extend into another room again. The impression that gives of the trains actually going somewhere is amazing and could hardly be overstated.
End of Winwood
06/03/25 08:10 Filed in: Benchwork
The benchwork that supported the Winwood section remained in place a long time.

Revised track plans have the layout eventually extending into the shop again, but not along this wall.

Removing the old benchwork opened up a lot of usable space in my shop, but it brought to mind how much Winwood had contributed to the operations on the layout back when it occupied three rooms. Car forwarding needs to be revised to accommodate the new, smaller layout.
Tracks and Trains
03/08/24 09:15 Filed in: Roadbed/Track
New sidings go in once the turnout is in place

Long strips of crossties are glued in position on the new assembly plant and boilerhouse sidings.

Once the glue is dry, the crossties are sanded level across the top and stained. Then the rail can go down. Code 70 rail looks especially small spanning the pit where coal will be unloaded for the boilerhouse.

"Work trains" with various locomotives and a range of rolling stock are run through the new turnout and down the new sidings to test the electrical connections and tune the track.

New track is the best excuse ever to do some operating.

Then I headed up to the Quarry Gardens at Schuyler to make some track adjustments on the Railroad Display.
New Mill Lead - 2
30/03/24 08:43 Filed in: Roadbed/Track
Extending off old roadbed

Plywood for the new subroadbed is not quite as thick as the old subroadbed. Apparently I didn't notice that when I was installing it, so I had to come up with a shim to raise the Homasote roadbed up to match the height of the old roadbed. Or maybe the new Homasote is thinner than the old. At any rate an adjustment in height had to be made right under the location of a new turnout.

The new Homasote roadbed painted black and glued in position. The gap in the boilerhouse roadbed is space for coal to be unloaded from hopper cars.

A Fast Track turnout tacked in position so crossties can be cut and spaced.

Crossties cut and placed in postion. The turnout will be lifted off and the turnouts glued down. This area proved to be a problem in that the turnout spans across three sections of Homasote. The thickness and density of each of the three sections vary. To have a roadbed situation like this directly under a turnout is asking for problems.
New Mill Lead
02/03/24 08:53 Filed in: Roadbed/Track
Rearranging Yet Again

Continuing with track revisions, work focused on the new mill lead.

One of the turnouts for the locomotive service track had to be pulled up.

Two new turnouts had to be fabricated.

The rails for the locomotive service track turnout were lifted, the ties and ballast scraped off the Homasote roadbed.

The new Mill Lead turnout was positioned so the Tortoise switch machine for the old locomotive service track turnout did not have to be moved. Same hole in the roadbed, same actuator rod. Previously, the locomotive service track turnout had been positiioned to take advantage of a pre-existing Tortoise location. Therefore this Mill Lead turnout is the third turnout powered by the same Tortoise switch machine.